The difference between Windows XP Home and Pro
The two products are 99 per cent identical. You would only go for the Pro version if you want the following additional options, considered useful for business users:
- The ability to log into Windows NT systems
- Has the Remote Desktop feature
- NTFS file encryption
After installing Windows XP
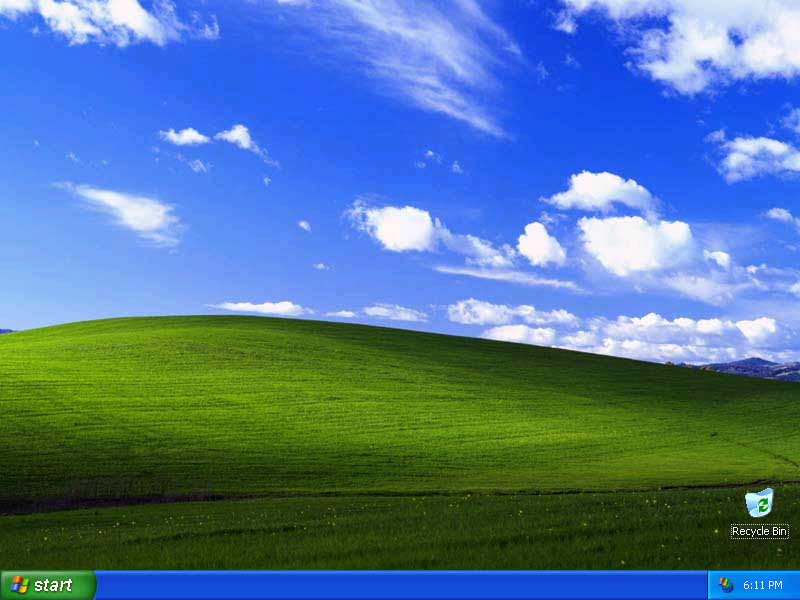
On freshly installing Windows XP, Microsoft has decided to reduce the clutter of icons on the desktop. Instead, you will find them in the Start menu. Only the Recycle Bin icon will be shown.
For PC users wanting to return to the original desktop icons of previous Windows versions:
- Open the Display control panel icon (under "Appearance and Themes").
- Click the Desktop tab
- Click on the Customize Desktop
- Select which icons you wish to appear on the desktop.

Changing the background
The picture of a grassy hill under a sunny blue sky may be too much for some users. To change this, click the Start button>Settings>Control Panel>Display. Select the Desktop tab and change the Bacground image setting to a picture of your choice. If you prefer a plain blue background, choose "None".
What's under the Start button menu?
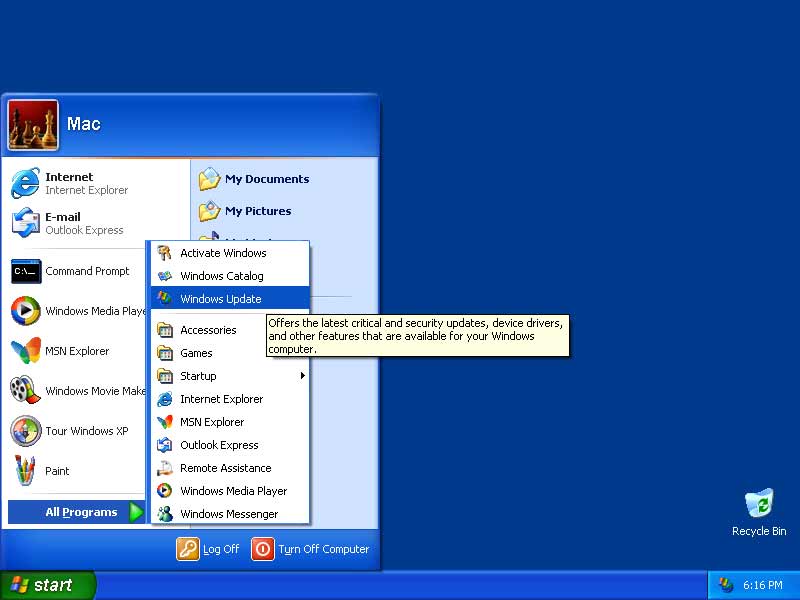
When you will see under the Start menu is this:

As part of Microsoft attempt to keep the desktop clutter-free of icons, the list of recently opened programs will be shown above the "All Programs" menu. The My Documents, My Pictures, My Music and My Computer icons are now under the Start menu.
Windows Update
This is something you should do about once a week. It helps keep your Windows XP more secure and stable. To access this feature:
- Click the Start button
- Choose All Programs menu
- Select Windows Update.
- Pick the updates you want to install.

Tweaking Windows XP
Open the System Restore feature in the Systems control panel icon (under "Performance and Maintenance"). Some users may prefer to protect their Windows system files by enabling this feature. Other users prefer not to. You decide.
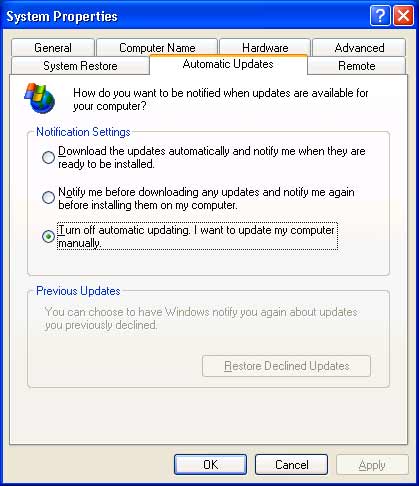
For greater privacy and minimise annoying messages popping up when you least expect them to, disable the Automatic Updates feature. To disable this feature, open the System Properties control panel, click the Automatic Updates tab and click the radio button that says, " Turn off automatic updating. I want to update my computer manually".
Another annoying feature is the prompt that appears on a daily basis to clean up icons on the desktop. To disable this feature:
- Open the Display control panel icon.
- Click the Desktop tab
- Click the "Customize Desktop..." button.
- Turn off "Run Desktop Cleanup Wizard" option.
Want to see the time on the task bar?
- Right-click on the taskbar and choose Properties.
- In the Taskbar and Start Menu Properties window, put a tick in the "Show the clock" box.
- If you want other icons to appear in the taskbar, place a tick in the appropriate box in the Taskbar or Start Menu tabs.
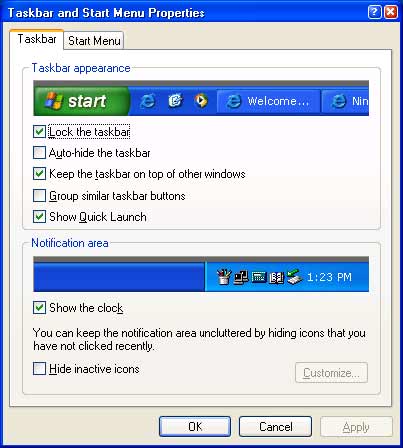
Now close this Taskbar and Start Menu Properties window. Double-click the clock on the taskbar and set the correct time and time zone.
Opening Accessibility Wizard
The Accessibility Wizard helps you to configure Windows XP to suit your vision, hearing and mobility needs. It is particularly useful for people who are blind, deaf or have difficulties in these areas. It includes those who have difficulty using the keyboard and/or mouse.
You access this wizard as follows:
- Select the Start button.
- Point to All Programs.
- Point to Accessories.
- Point to Accessibility.
- Select Accessibility Wizard.
- Click the Next button to continue through the wizard.
The wizard will start with Text Size. You just have to click the text size you are comfortable with. Next is the Display Settings. This windows allows you to place a tick in the boxes for changing font size, screen resolution, use Microsoft Magnifier and disable personalised menus. The next wizard window is Set Wizard Options. If you have a particular disability, you would be wise to place a tick against the box that closely matches your disability. In that way, Microsoft can customise your experience with Windows XP. Finally, you click the Finish button to complete the Wizard. Accessibility options are set.
Other accessibility utilities can be found in the Program menu under the Start button. Look for Magnifier (magnifies the computer screen), Narrator (a text-to-speech utility), On-Screen Keyboard (virtual keyboard on the screen clickable using a mouse or joystick), and Utility Manager (for administrators to start and stop accessibility programs).
To adjust the accessibility settings, use the Accessibility Options control panel instead of the Wizard.
Cleanup and defragmentation
Now that Windows XP has been customised to suit your needs, run the Disk Cleanup utility:
- Click the Start button
- Choose All Programs>Accessories>System Tools>Disk Cleanup
- Put a tick in the boxes for removing any temporary files and System Restore files.
Finally run the "Disk Defragmenter utility":
- Click the Start button
- Choose All Programs>Accessories>System Tools>Disk Defragmenter
- Run the program.
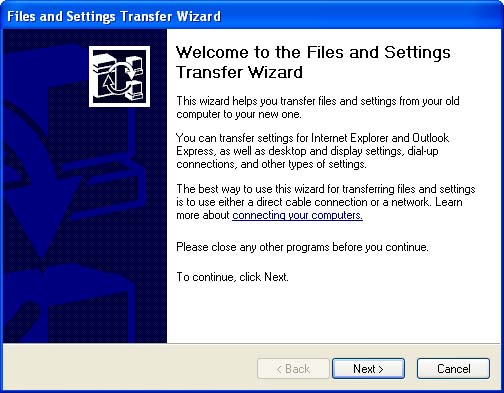
The Files and Settings Transfer Wizard
Once Windows XP is set up just right for a user, it is useful to carry over those preferred settings for fonts, colours, wallpapers and more, as well as files and applications from one Windows XP machine to another. Windows XP can do this as follows:
- Make a backup copy of your files and settings by connecting your Windows XP computer to another. If you are not on a network, use a null modem serial nine-pin cable to plug into the serial (COM) port on each computer.
- Click Start button on the computer running Windows XP. If both computers have Windows XP, you can start with either.
- Go into All Programs>Accessories>System Tools, and select "Files and Settings Transfer Wizard"
- The first window of the wizard lets you know you should close any other programs before you continue. Click the Next button.
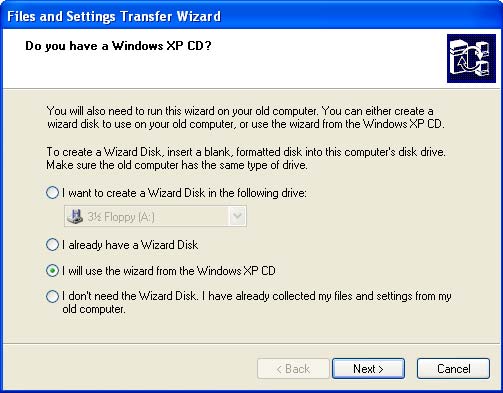
- Depending on the PC you are on, you need to select whether it is the New or Old Computer. You should begin with the New Computer.
- On your new computer (the machine you want to receive the settings and files from the old computer), chose to use the wizard from the Windows XP CD.
- Go to the old computer (can be ny PC running Windows 95 up to Windows XP) and use the Windows XP CD to start the Files and Settings Transfer Wizard.
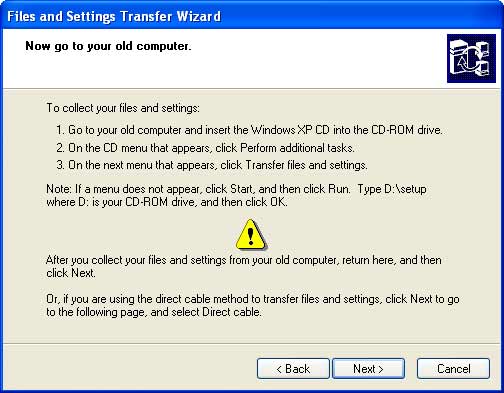
- Select the files and settings to transfer, or select default.
- Click Next and the wizard will begin collecting the files and settings from the old computer.
- Go to the new computer and start the Files And Settings Transfer wizard again.
- Tell the wizard you are on the new computer and choose "I don't need the Wizard Disk. I have already collected my files and settings from my old computer".
- Tell the wizard where to look for the collected items
- After the transfer is complete, copy over files that couldn't be transferred.
- You new computer is ready to go.
To establish connection to printers
To quickly connect to printers on a network, when it says on the printer something like "CSDHP4 on dax", type the address as follows: "\\dax\csdhp4" in the printer setup wizard window.